1

Essential for playing at Bendominoes (factory, wikipedia) is proper alignment of the tiles — which are curved dominoes — as they are placed end to end. This report gives some examples of markings for a playing surface that will assist correct placement.
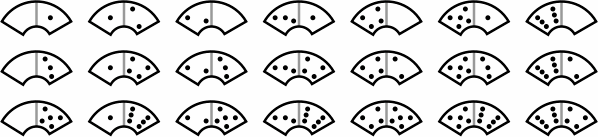
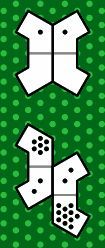
The set examined for this report has 28 tiles that correspond to traditional double-six dominoes:
| figure 1 | doubles |
|
|---|---|---|
| non-doubles |
|
The tiles of figure 1 can be characterized this way:
One way to extend the set is to allow more than six pips; among traditional dominoes, double-nine and double-twelve sets are well known. Figure 2 illustrates another way to enlarge the set, with 21 non-double reverse tiles:
| figure 2 | 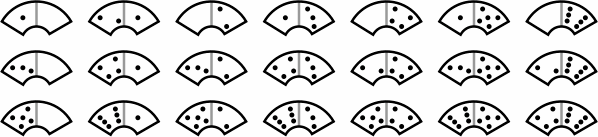
|
|---|
Tiles have an outer radius of 33 millimeters, inner radius of 12 millimeters, and thickness of 10 millimeters. The exact distances are not critical as long as all tiles are the same size. Each curve subtends 120 degrees of arc, and this angle is critical so that three tiles precisely form a circle. The tiles might instead have been manufactured with a 90-degree angle, resulting in a similar game with four tiles forming a circle.
Pips come in a variety of colors as in figure 3, but for simplicity this report disregards that feature.
| figure 3 | 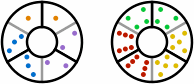
|
|---|
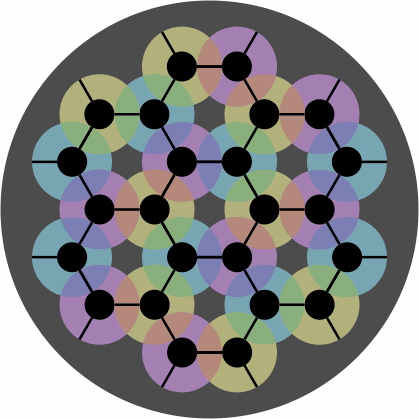
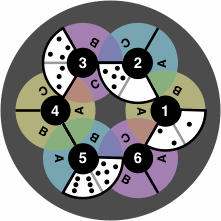
A convenient size of playing surface is this 24-disk board:
| figure 4 | 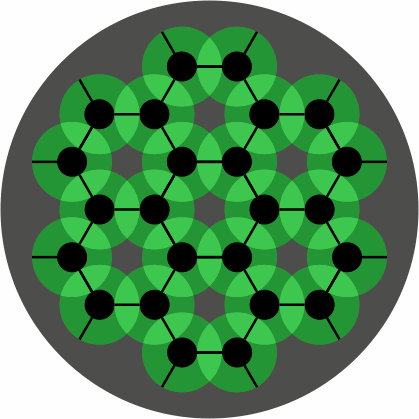
|
|---|
When a tile is placed on the board, its concave side should be touching a black dot, and both its ends should be touching black lines. Figure 5 shows the board with some correctly-placed tiles; no tile ever covers a gray region of the board.
| figure 5 | 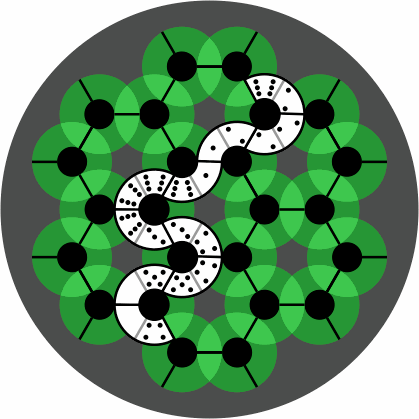
|
|---|
A 6-disk board, although not large enough for serious competition, has enough room to display the difference between wrong and right placement:
| figure 6 | 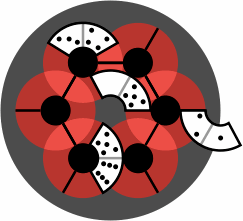 | 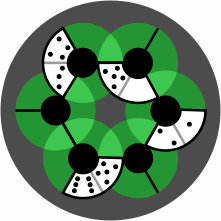
|
|---|---|---|
| wrong | right |
In the usual rules for Bendomino games, each tile after the first must be placed end-to-end with a previous tile. However, this board allows the development of games and puzzles relaxing this rule, because proper alignment of tiles is assured.
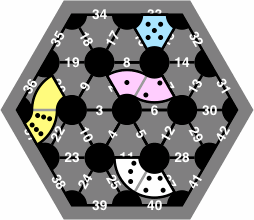
Figure 7 depicts disks in two or three colors, with intermediate hues for their overlap:
| figure 7 | 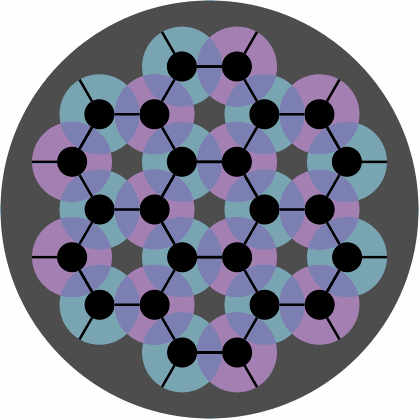
| 
|
|---|
Players might devise special rules that depend on the colors. Alternatively, the disks can be omitted entirely, yielding a diagram that happens to resemble one layer of graphite:
| figure 8 | 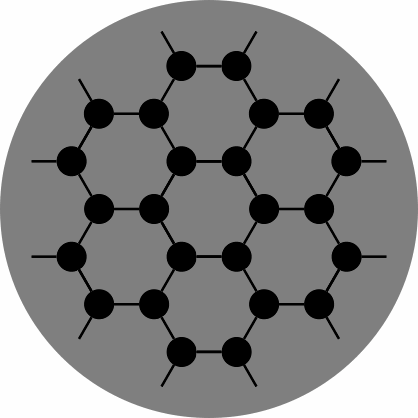
|
|---|
To record the moves of a game, it is convenient that locations have labels. Figure 9 is one way to do it:
| figure 9 | 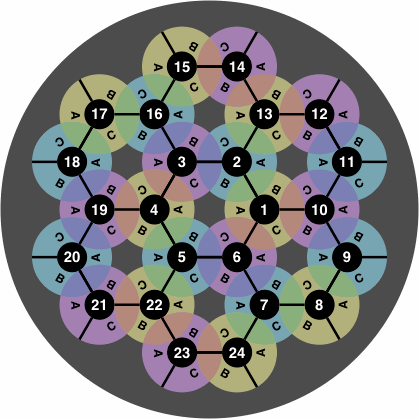
|
|---|
In the following example of how to interpret the labels, tile 1-2 is placed at 1C, 0-5 at 2B, 3-4 at 3A, and 5-6 at 5C:
| figure 10 | 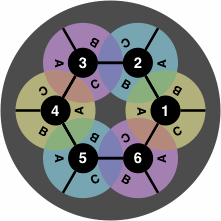
| 
|
|---|
Not all locations can be used simultaneously. For instance, as soon as a tile is tile is placed at 2B, locations 1A and 3C become unavailable. This labeling scheme readily extends to larger boards, for example figure 11:
| figure 11 | 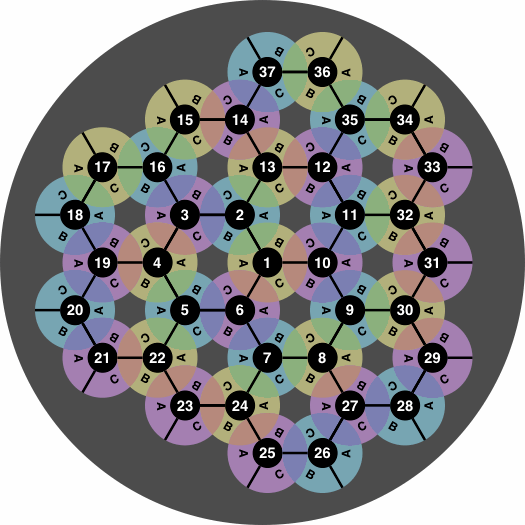
|
|---|
An option is to highlight the spiral pattern of the numbers:
| figure 12 | 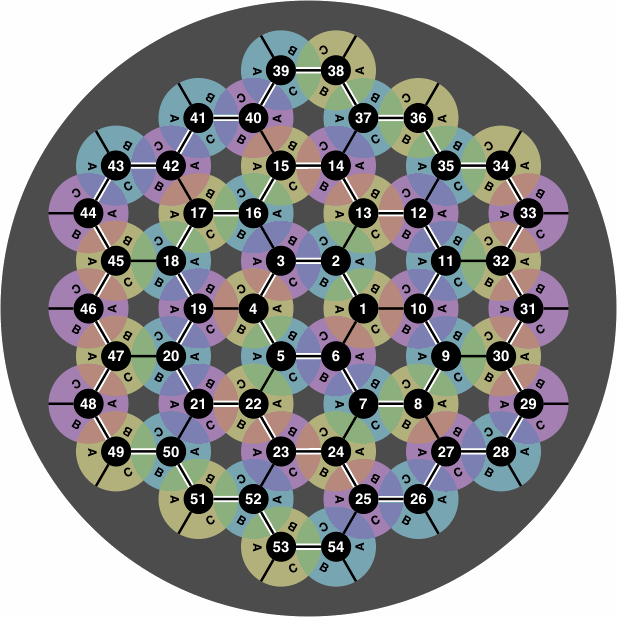
|
|---|
From time to time a student will want to re-enact a game from its transcript, but the student's board may be of a size different from that used for the transcribed game. If manufacturers standardize all boards to be approximately round, with spiral numbering that begins in the center, the student will have the best chance to interpret the transcript with the board he has. Figures 9 through 12 observe this standard.
On the other hand, a non-round board (figure 13) might become necessary if play is confined to a cramped space such as a train or bus. Not obvious is what the best numbering scheme would be.
| figure 13 | 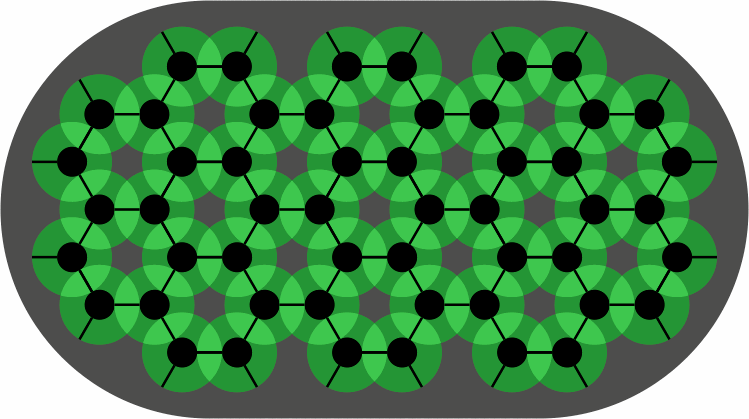
|
|---|
In a variant not manufactured, the two halves of the tile curve opposite directions. To help tell the difference between the two varieties, the tiles that skew left are tinted in yellow, and those that skew right are magenta.
| figure 14 | 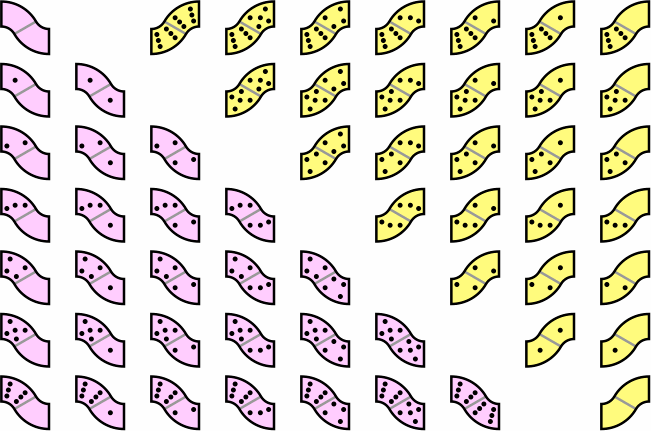
|
|---|
Because a large number of such skew tiles are possible, a more manageable set might omit the sixes and fives.
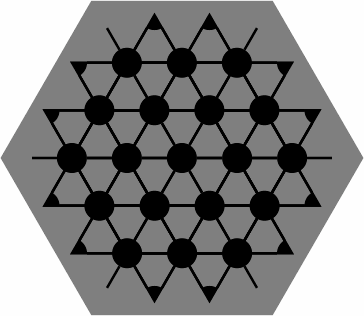
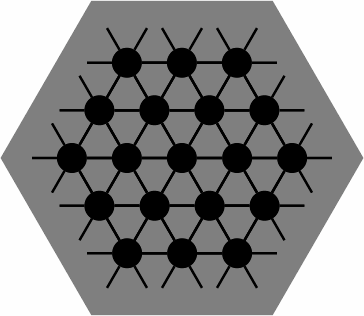
Figure 15 contains three alignment diagrams for skew tiles differing only in closure of the edge; players choose whichever they prefer. They resemble figure 8 but have additional black dots, some of them fractional. The colored disks of figure 4 are left out because there would be too many of them, providing more confusion than guidance.
| figure 15 | 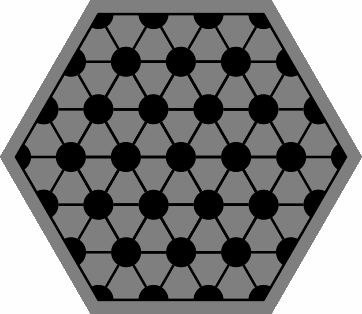
| 
| 
|
|---|---|---|---|
| closed edge | mixed edge | open edge |
Figure 16 shows how the edge configuration affects the way that tiles can be played near the edge of the board. As always, each concave curve hugs a black dot, and the ends of a tile fall on black lines. All tiles shown are legal; but with less edge closure, fewer placements are permitted.
| figure 16 | 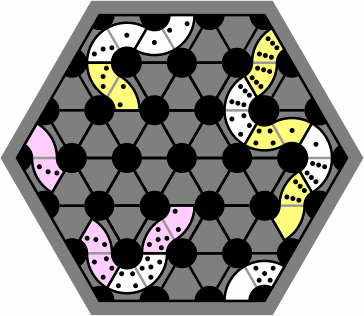 | 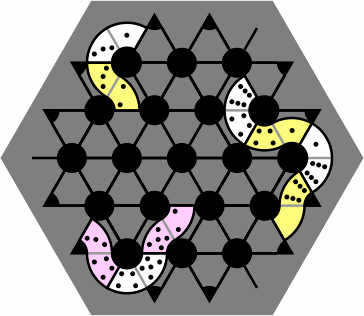 | 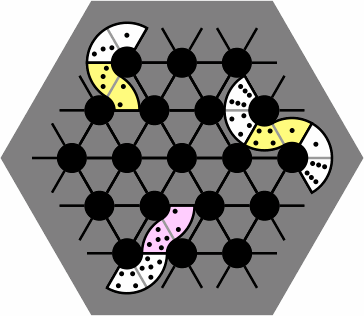
|
|---|
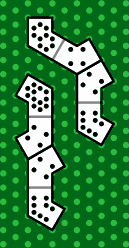
Figure 17 is a sample layout with one long chain of both skew and non-skew tiles, as might appear in a game:
| figure 17 | 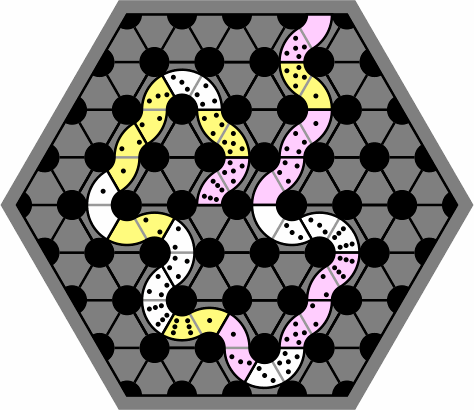
|
|---|
At the beginning of most domino games, all the tiles are placed face down and scrambled, and players choose their tiles at random. Because the non-skew, left-skew, and right-skew tiles are distinguishable even when face down, game rules might specify that each player take a certain number of each.
A tile with only one number, roughly triangular in shape, also fits the skew alignment diagram. It has three concave curves, each of which must abut a fractional or whole black dot. Despite having only one number, this tile takes three neighbors and thus permits branching of the layout. It is tinted cyan in the drawings for ease of identification.
| figure 18 | 
|
|---|
The degree of edge closure affects placement of the one-number pieces in much the same way as other tiles. Figure 19 corresponds to figure 16:
| figure 19 | 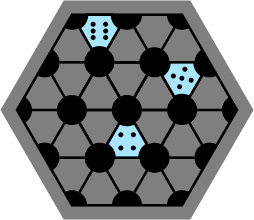 | 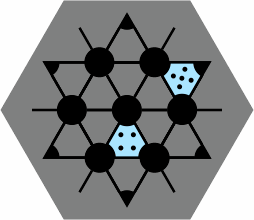 | 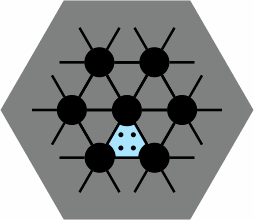
|
|---|---|---|---|
| closed edge | mixed edge | open edge |
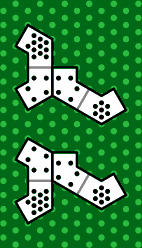
Figure 20 is an example of how to use them:
| figure 20 | 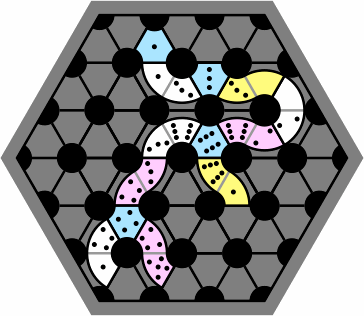
|
|---|
Figure 21 shows a labeling scheme for recording a game. Although it differs from figure 9, it is still a rough spiral starting at the center of the board.
| figure 21 | 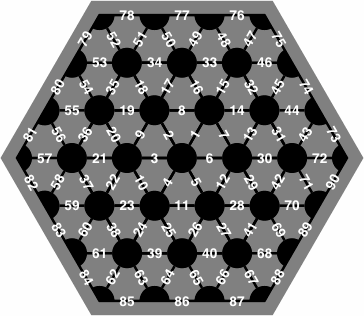 | 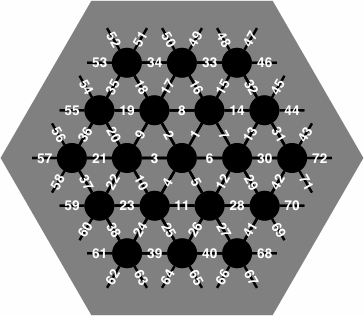
|
|---|---|---|
| closed edge | open edge (same numbering for mixed edge) |
On the actual board the numbers would likely be printed smaller than suggested by this image, but limitations of computer screen resolution required the numbers to be drawn artificially large for this picture.
The following is a suggested notation for recording the placement of a tile:
Figure 22 contains some examples:
| figure 22 | 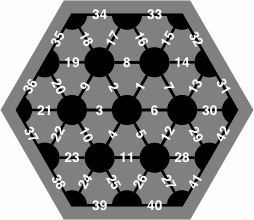
| 
| |||||||||
|---|---|---|---|---|---|---|---|---|---|---|---|
| |||||||||||
Notation 37-20-6-0, which puts the larger line number first, is nonstandard but unambiguous. In contrast, 20-37-6-0 is wrong because in this example the 6 pip does not touch the 20 line.
Players who regard the edge of the board as a needless constraint may obtain a closed-edge diagram and wrap around. In figure 23, the 1-2 at the top is adjacent to the 2-3 at the bottom, both at the X3 marking. Similarly, the 6-0 and 0-4 abut via Z2; likewise for 5-3 and the single 3 via Y2. Hence this layout is one long chain.
| figure 23 | 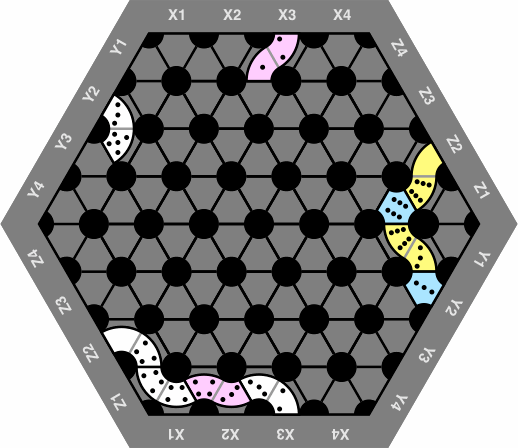
|
|---|
Note that when numbers are added to the wrap-around board, some are repeated:
| figure 24 | 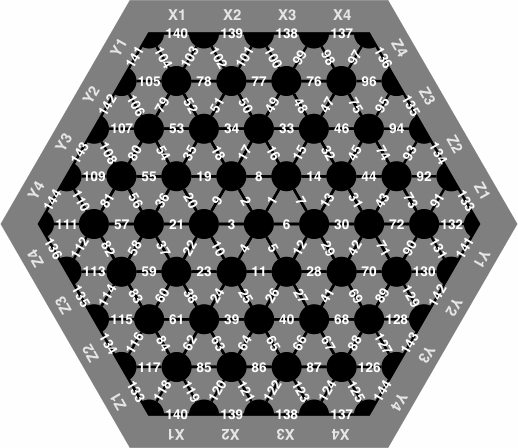
|
|---|
The design of bendominoes is based upon circular arcs. However, there is a certain octagon which can not only substitute for the arc-based tiles in ordinary play, but which can further offer additional possibilities of matching. Some examples of polybens (polygonal bendominoes), along with their numerical designations, appear in figure 25:
| figure 25 | 
| 
| 
|
|---|---|---|---|
| 0-1 | 2-3 | 4-5 | |

| 
| 
| |
| 6-7 | 8-9 | 10-11 | |

| 
| 
| |
| 12-13 | 13-12 | 6-6 |
Note that 12-13 is distinct from its mirror image 13-12; for best results a set should never have one of a mirror-image pair without the other. A tile like 6-6 is naturally called a double. The tiles conveniently hold as many as thirteen pips, but a useful set of 36 tiles can be made by going no higher than five, as in figure 26:
| figure 26 | 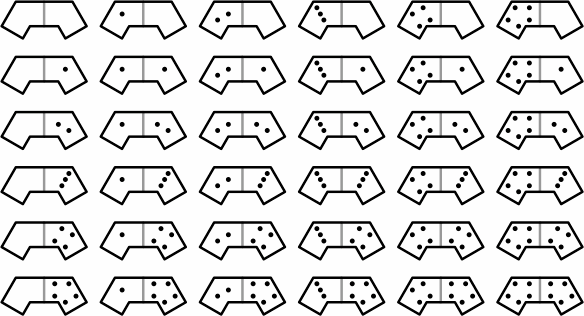
|
|---|
Proportions of the tile, specified in figure 27, are critical, although the entire piece can be made larger or smaller as manufacturers opt. A likely size would have one unit equalling twelve millimeters.
| figure 27 | 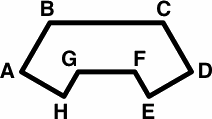
| length: | 1 unit | EF, GH |
|---|---|---|---|---|
| √3 units | AH, DE | |||
| 2 units | AB, CD, FG | |||
| 4 units | BC | |||
| angle: | 90 degrees | A, D, E, H | ||
| 120 degrees | B, C, F, G |
The sides have names:
The belly is the same length as a shoulder, or half of the back; the tile was designed this way in order to provide plenty of matching opportunities.
As before, three tiles form a loop. Figure 28 corresponds to figure 3:
| figure 28 | 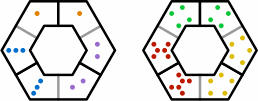
|
|---|
Figure 29, equivalent to figure 5, shows end-to-end matching of polybens. The suggested alignment diagram for polybens is simply a triangular grid of dots, which is noticeably simpler than the diagram for the curved version (figures 7 or 15). The number of dots in the grid and its overall shape accord to the preference of the players.
| figure 29 | 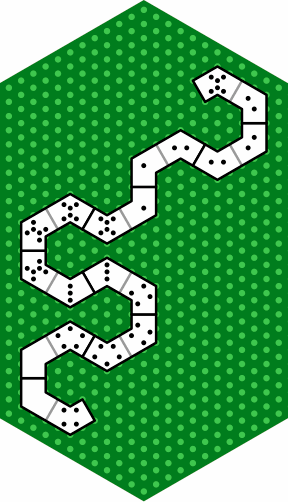
|
|---|
When a tile is correctly placed, each of its eight corners (lettered A through H in figure 27) will fall precisely on a dot, as will the ends of the dividing bar in the middle of the tile. The magnification of figure 30 shows this more clearly:
| figure 30 | 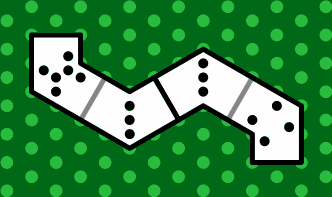
|
|---|
The reason for the polygonal design is to allow the tiles to abut in more ways than in the original circular scheme. Players when negotiating the rules before starting a game will probably choose to allow some, but not all, of the configurations displayed in figure 31:
| figure 31 | 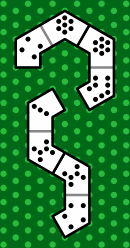
| 
| 
| 
| 
|
|---|---|---|---|---|---|
| 31a | 31b | 31c | 31d | 31e |
Notes:
Figure 32 shows how three or four tiles might meet at their ends, backs and shoulders:
| figure 32 | 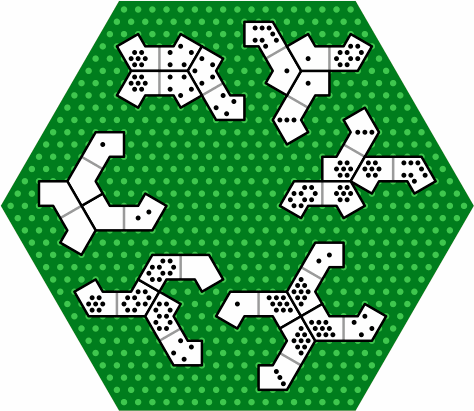
|
|---|
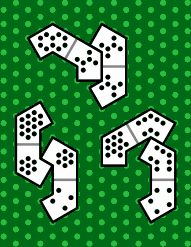
Figure 33 is an example of a complicated layout:
| figure 33 | 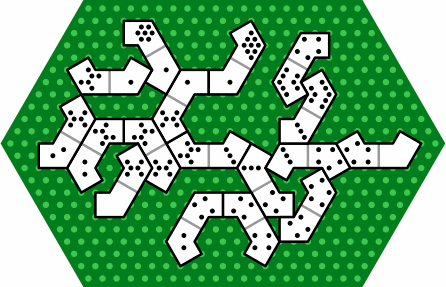
|
|---|
A suggested rule is to permit corner-to-corner adjacencies when they arise incidentally from side-to-side adjacencies, if the numbers match. In figure 33, these are 5-4 next to 4-4 in the lower right, and 1-6 next to 6-2 at the left.
Skew tiles naturally ensue. Figure 34 is the octagonal version of figure 14:
| figure 34 | 
|
|---|
Figure 35 is equivalent to figure 17. The grid of dots is especially helpful in this layout; without it players might worry about accurate tile placement, and wonder whether the 5-6 and 4-0 skew-right tiles near the center of the picture ought in fact to touch.
| figure 35 | 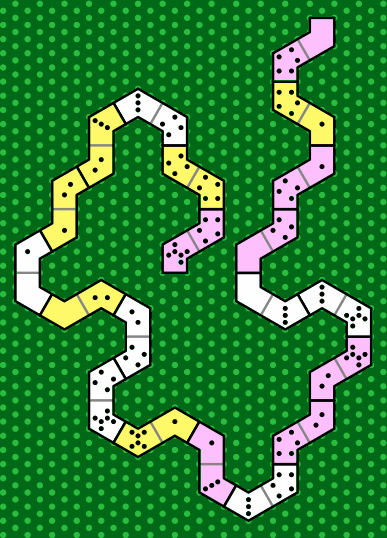
|
|---|
Figure 36, corresponding to figure 18, introduces single-number polygonal (more specifically, enneagonal) tiles.
| figure 36 | 
|
|---|
The sides of the single-number tiles come in only two lengths, the shorter being hooks and the longer being ends. In terms of the dimensions given in figure 27, the hooks are 1 unit, the ends √3 units, and the angles 90 or 120 degrees.
Besides containing tiles equivalent to those of figure 20, figure 37 includes many others to illustrate possible tile adjacencies. Players can decide which categories of adjacency they want to recognize.
| figure 37 | 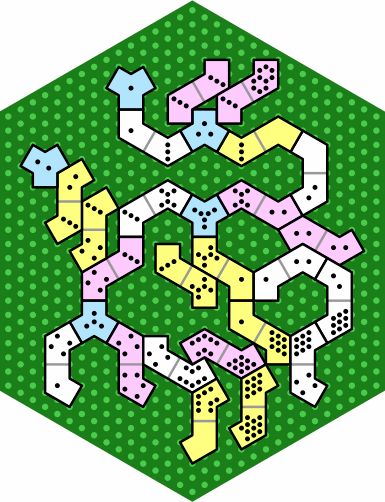
|
|---|
Yet another shape of tile results from putting the two halves of a tile together along a shoulder, or equivalently a half back:
| figure 38 | 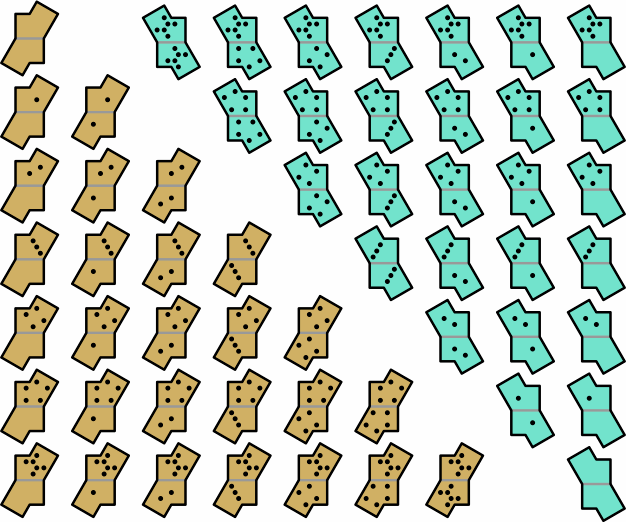
|
|---|
These decagonal pieces can fully participate in tessellations with the octagonal tiles of figures 26 and 34, and the enneagonal of figure 36.
The figures were prepared with Adobe PostScript, the acme of programming languages for graphics.